


Photo by Lala Azizli on Unsplash
A Guide on How to Interact with Smart Contracts using HTML, CSS and JS.


One of the many steep learning curves for web2 developers getting into web3 is: How do I interact (use) Smart Contracts via a frontend app? i.e., How can users interact with my Smart Contract? It is not enough to share your Smart Contract address and then direct your users to interact with the Contract on an explorer such as etherscan. In this guide, we will walk through a process that teaches you how to interact with your Smart Contract via a frontend UI.
Contents:
Blockchain Explorers.
Smart Contract frontend Libraries.
EthersJS.
Sample App using HTML and JS.
Blockchain Explorers
Different Blockchains have a User Interface where all transactions and other information (blocks, token information, contract data) are displayed in an easy to read and “interact with” format, usually a web page. The Blockchain explorer for ethereum is etherscan. According to its website: “Built and launched in 2015, it is one of the earliest and longest running independent projects built around Ethereum and its community with the mission of providing equitable access to blockchain data.”
It is vital for the Smart Contract developer to learn how to use the explorer for a particular chain that you deploy your Smart Contract code on. More so when the explorer grants the ability to upload your Smart Contract code and ABI, thus making available an interactive UI for your Smart Contract onchain.
Kindly read this guide, where I walk through deploying a Smart Contract to the Goerli testnet. In the guide, I walk you through the process of reading and writing to the Smart Contract via the explorer.
It is not an optimal process for users to read and write to your contract via an explorer. It is more convenient to build a user interface that will make the process easy. It is vital to understand how the Smart Contract information can be read and write from a chain. The ethereum.org guides sufficiently explain this process:
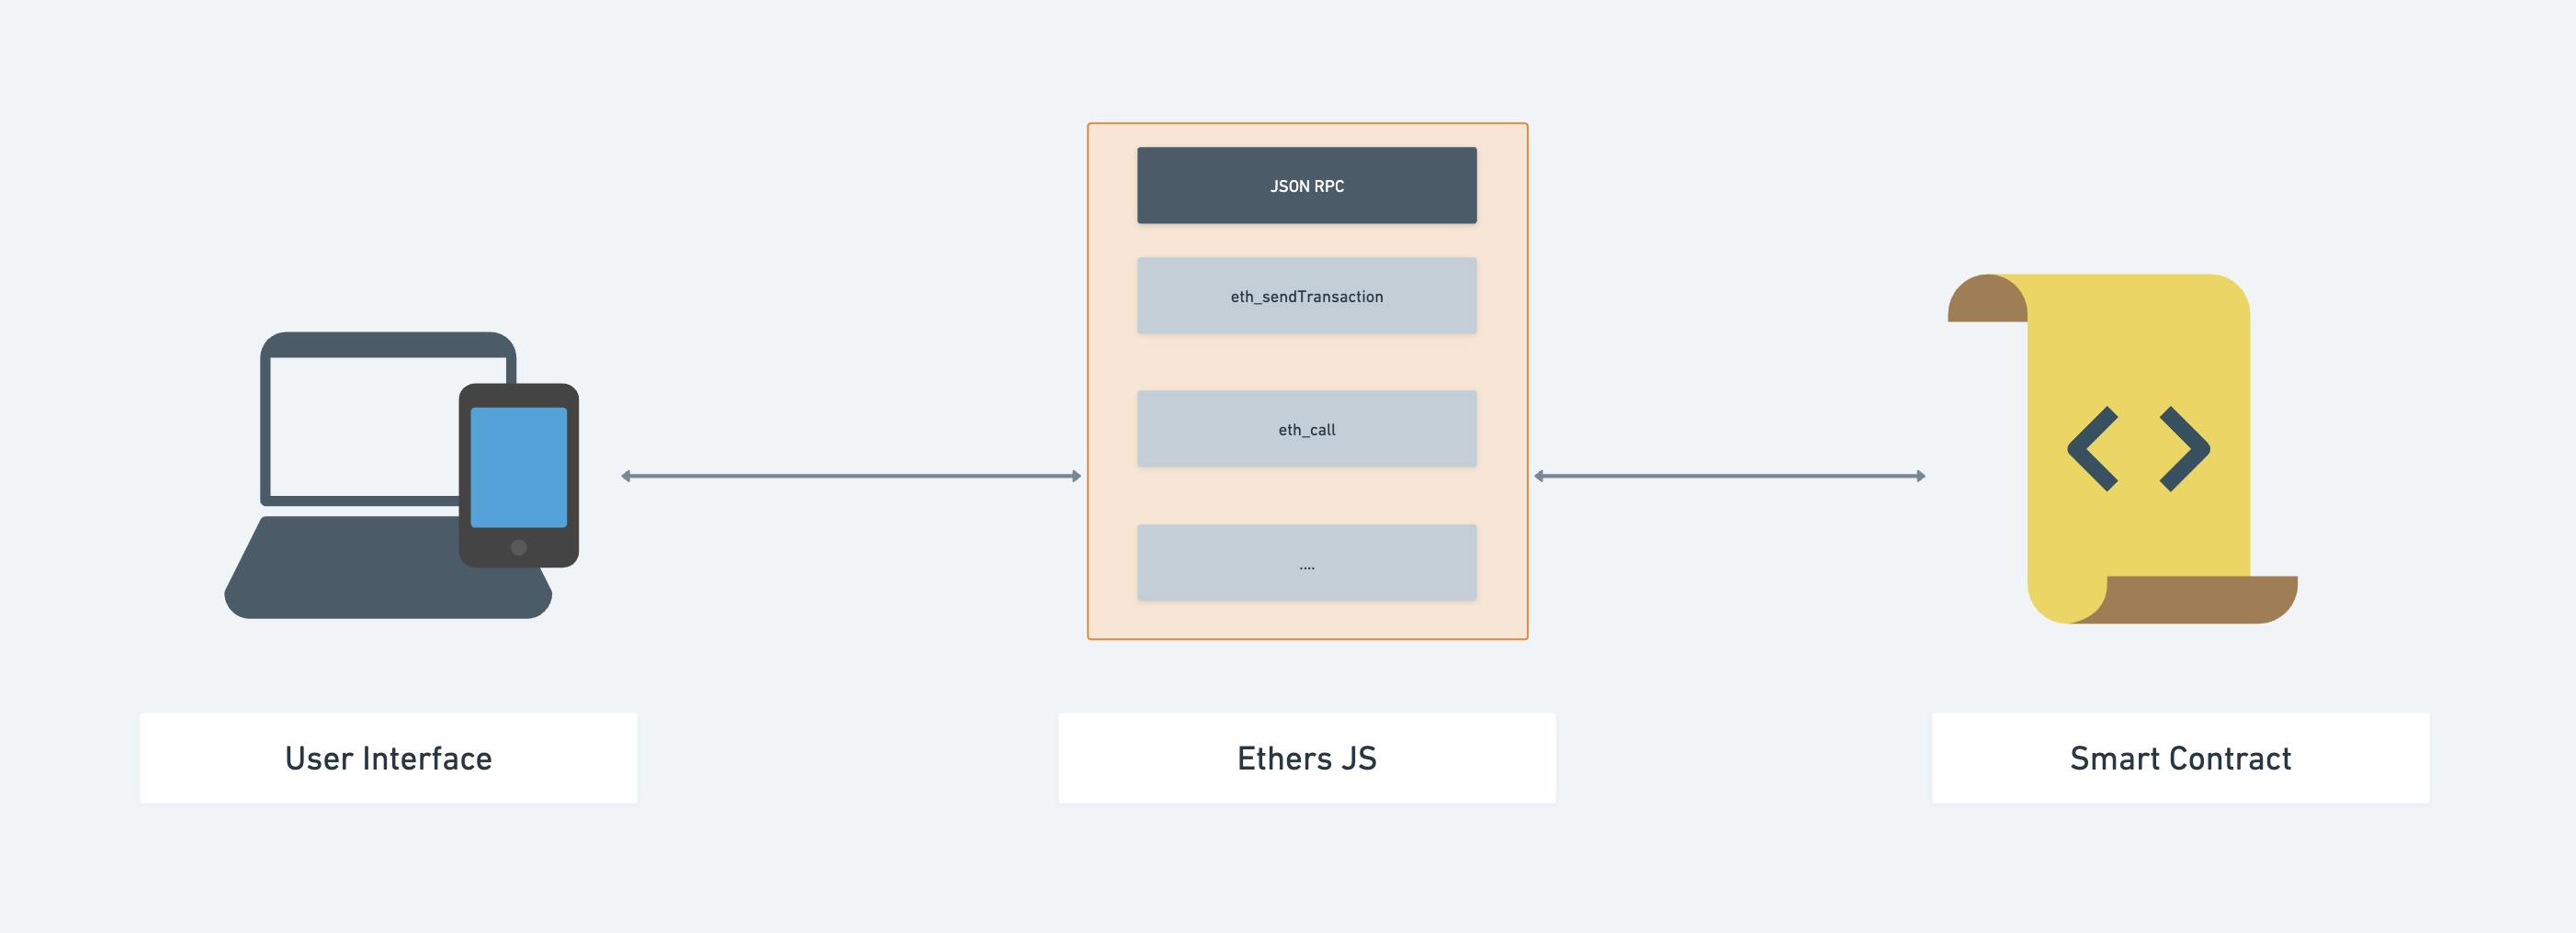
“In order for a software application (UI) to interact with the Ethereum blockchain - either by reading blockchain data or sending transactions to the network - it must connect to an Ethereum node.
For this purpose, every Ethereum client implements a JSON-RPC specification, so there are a uniform set of methods that applications can rely on regardless of the specific node or client implementation.
JSON-RPC is a stateless, lightweight remote procedure call (RPC) protocol. It defines several data structures and the rules around their processing. It is transport agnostic in that the concepts can be used within the same process, over sockets, over HTTP, or in many various message passing environments. It uses JSON (RFC 4627) as data format. [sic].”
“While you may choose to interact directly with Ethereum clients via the JSON-RPC API, there are often easier options for dapp developers. Many JavaScript and backend API libraries exist to provide wrappers on top of the JSON-RPC API. With these libraries, developers can write intuitive, one-line methods in the programming language of their choice to initialize JSON-RPC requests (under the hood) that interact with Ethereum.”
Smart Contract Frontend Libraries
The frontend JavaScript Library for interacting with Smart Contracts and building UIs are Web3JS and EthersJS
Web3JS: “web3.js is a collection of libraries that allow you to interact with a local or remote ethereum node using HTTP, IPC or WebSocket.”
EthersJS: “The ethers.js library aims to be a complete and compact library for interacting with the Ethereum Blockchain and its ecosystem.”
To demonstrate how EthersJS works, we will build out a Sample App using plain HTML and JavaScript. This approach allows you to learn how to interact with Smart Contracts at the basic implementation level. This approach will cement your knowledge and thus lay a proper foundation for building with other JavaScript libraries such as ReactJS and VueJS.
Sample App using HTML and JS.
For our sample dapp, we will use the Smart Contract from a previous article. It is a simple “Hello, World!” contract. We will use the Hardhat tool to compile and deploy the Smart Contract to a local blockchain, and then we will deploy it to the Goerli testnet. You can read my Guide on How to compile and deploy Smart Contracts using Hardhat.
Here are the steps:
- Choose a dir name for your project and create one
mkdir hello_world && cd hello_world
- Initialize a project using npm default init command:
npm init -y
- Hardhat is a Library and will have to be installed as a project dependency:
npm install --save-dev hardhat @nomicfoundation/hardhat-toolbox
//@nomicfoundation/hardhat-toolbox is a hardhat plugin which has everything you need for developing smart contracts.
- Set up hardhat in the project by running the command:
npx hardhat
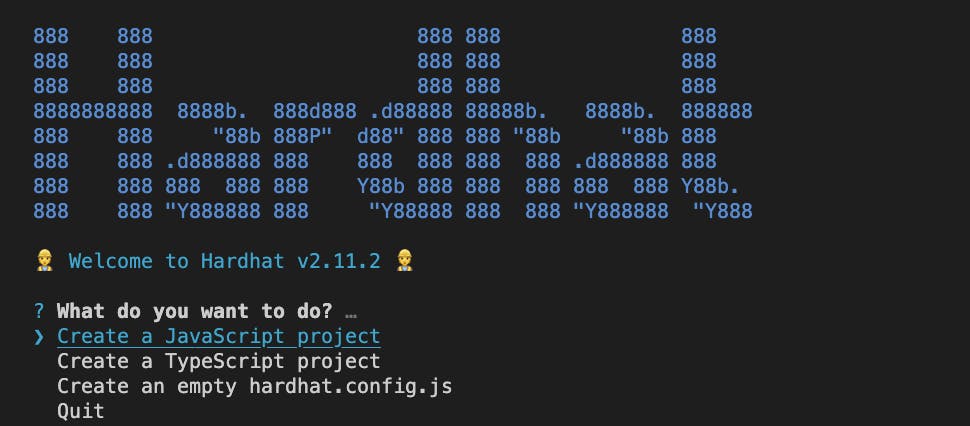
Select the option: “Create a javascript Project.”
- Open the ‘hello_world’ project in your IDE of choice, the directory will look something like this:
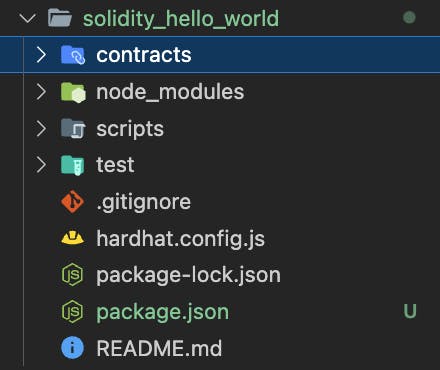
Open the Contracts dir and create a new file: HelloWorld.sol, where .sol is an extension denoting that it is a solidity file. This is where our Smart Contract code will be written. Copy the code below into the file:
// SPDX-License-Identifier: GPL-3.0

pragma solidity ^0.8.17;

contract HelloWorld {

  address public owner;
  string greeting;

  constructor(){
    owner = msg.sender;
  }

  function setGreeting(string memory _greeting) public {
     greeting = _greeting;
  }

  function getGreeting() public view returns(string memory) {
    return greeting;
  }

}
This article assumes that you have a basic understanding of how Solidity works. If you want a line by line breakdown of this code, you can read my guide: “Welcome to Solidity!”
- The next step is to compile of Contract. This process will generate the Contract ByteCode that gets deployed to a chain and the Contract ABI, which we will need to interact with the Contract via a UI.
npx hardhat compile
You will see a message in the terminal:
Compiling 1 file with 0.8.17
After the compilation has completed, hardhat will create two folders in the project directory: artifacts and cache. Open the artifacts dir and go to contracts/HellowWorld.sol and open the file: HelloWorld.json, here you will find the abi in an array. The last step of this session will be to deploy the Smart Contract to a local hardhat node.
- Building Smart Contracts with Hardhat requires writing a script that is needed to indicate the network to deploy the Smart Contract. We will write a script that will deploy the Smart Contract to a local node. Open the scripts folder in the directory and create a new file
deploy_helloWorld.js, add the following code to the file:
const hre = require("hardhat");

async function main() {
  const Contract = await hre.ethers.getContractFactory("HelloWorld");
  const contract = await Contract.deploy();

  await contract.deployed();

  console.log(`Contract deployed to ${contract.address}`);
}

main().catch((error) => {
  console.error(error);
  process.exitCode = 1;
});
- The last step of this session will be to deploy the Smart Contract to a local hardhat node. Run the command: npx hardhat run --network localhost scripts/deploy_helloWorld.js You will see a message in the terminal:
Contract deployed to 0x….
The Contract has been deployed successfully! The next step is to build a UI to interact with the Contract. It is going to be a simple UI that contains an input field and a Button to send data to the deployed Contract, and a span tag to read data from the deployed Contract.
Building the UI
There are a collection of UI Libraries that developers can use to start building interfaces to connect with Smart Contracts. In this guide, we will build a UI using plain old HTML and JS. This is so that developers can understand, line by line, how the interaction works between Smart Contracts and UI at the very basic level.
To connect to the Smart Contract from the UI, we will use the ethers js to handle all the abstraction calls to the JSON-RPC.
Kindly create a directory in the root of the folder containing the Hello World files, name the directory frontend. Inside the frontend directory, create the following files: index.html, index.js and ethers.js
To add ethers js to the project, kindly visit the ethers js cdn copy the entire file and paste it inside ethers.js . It is better practice (for security reasons) to copy the ethers library to your own webserver and serve it yourself, which is what we are doing in this sample dapp.
HTML
We are going to use the BootStrap Library to build out a basic UI. Open the index.html file and paste this code:
<html>
<head>
<link rel="stylesheet" href="https://stackpath.bootstrapcdn.com/bootstrap/4.3.1/css/bootstrap.min.css" integrity="sha384-ggOyR0iXCbMQv3Xipma34MD+dH/1fQ784/j6cY/iJTQUOhcWr7x9JvoRxT2MZw1T" crossorigin="anonymous">
<script type="module" src="index.js"></script>
</head>
<body>
<div class="container">
<div class="row">
<div class="col-sm-12">
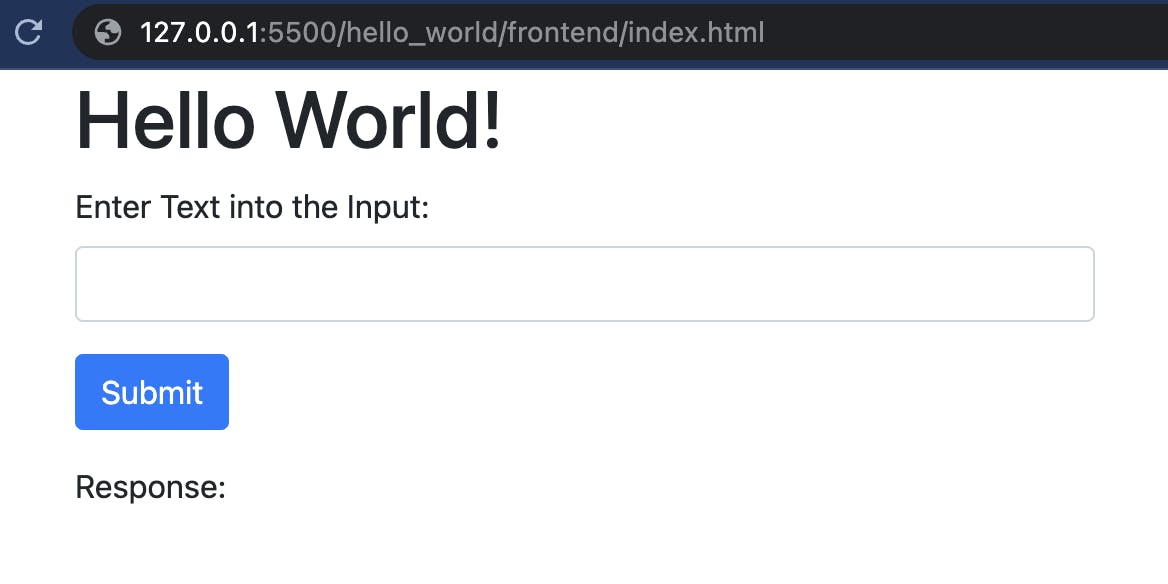
<h1>Hello World!</h1>
<form id="setGreeting">
<div class="form-group">
<label for="setGreetingInput">Enter Text into the Input:</label>
<input id="setGreetingInput" type="text" class="form-control"></input>
</div>
<button type="submit" class="btn btn-primary">Submit</button>
</form>
<div>Response: <span id="greeting"></span></div>
</div>
</div>
</div>
</body>
</html>
We will walk through the code and explain each line.
This is a HTML file with a <head> and <body> section. The <head>...</head> section contains the BootStrap CDN link that enables us style the page using the BootStrap Library without writing any extra CSS. It also contains the index.js file; this is the file where we will write the JavaScript and import the ethers js library. The script type must be set to module, as it prevents any errors due to the use of the import statement in the script.
The <body>...</body> section makes use of class definitions from BootStrap to align the page content: container, row, col-sm-12 and form, you can read about them in the BootStrap docs. It also contains a form which is a simple input, and a button, the input is where the user will enter an input to be sent to the Smart Contract. The <div> containing the Response also contains a <span>...</span>, where the response from the contract will be displayed.
The next step is to write the JavaScript code.
JS
All the code here is written in the index.js file, and we will walk through it line by line. Connecting the UI to the Smart Contracts can be broken into three distinct steps: Import the Ethers JS Library Connect the Smart Contract to the UI Implement functions to Write and Read the Smart Contract.
- Import the Ethers JS Library: At the top of the
index.jsfile, declare the import
Import { ethers } from `./ethers.js`;
This is a named import type that makes the ethers.js library module available in the file as ethers. This imports the ethers.js Library.
- Connect the Smart Contract to the UI: In this step, we will need the Smart Contract address, ABI, and the Ethers
getSigner()to create a connection to the UI, which we will confirm via the UI console. Here is the code:
    const HelloWorldAddress = `0x…..`;
    const ABI = [
 {
      "inputs": [],
      "stateMutability": "nonpayable",
      "type": "constructor"
    },
    {
      "inputs": [],
      "name": "getGreeting",
      "outputs": [
        {
          "internalType": "string",
          "name": "",
          "type": "string"
        }
      ],
      "stateMutability": "view",
      "type": "function"
    },
    {
      "inputs": [],
      "name": "owner",
      "outputs": [
        {
          "internalType": "address",
          "name": "",
          "type": "address"
        }
      ],
      "stateMutability": "view",
      "type": "function"
    },
    {
      "inputs": [
        {
          "internalType": "string",
          "name": "_greeting",
          "type": "string"
        }
      ],
      "name": "setGreeting",
      "outputs": [],
      "stateMutability": "nonpayable",
      "type": "function"
    }

];

    const signer = getSigner();

    const Contract = new ethers.getContractFactory(HelloWorldAddress, ABI, signer);

    console.log(Contract);
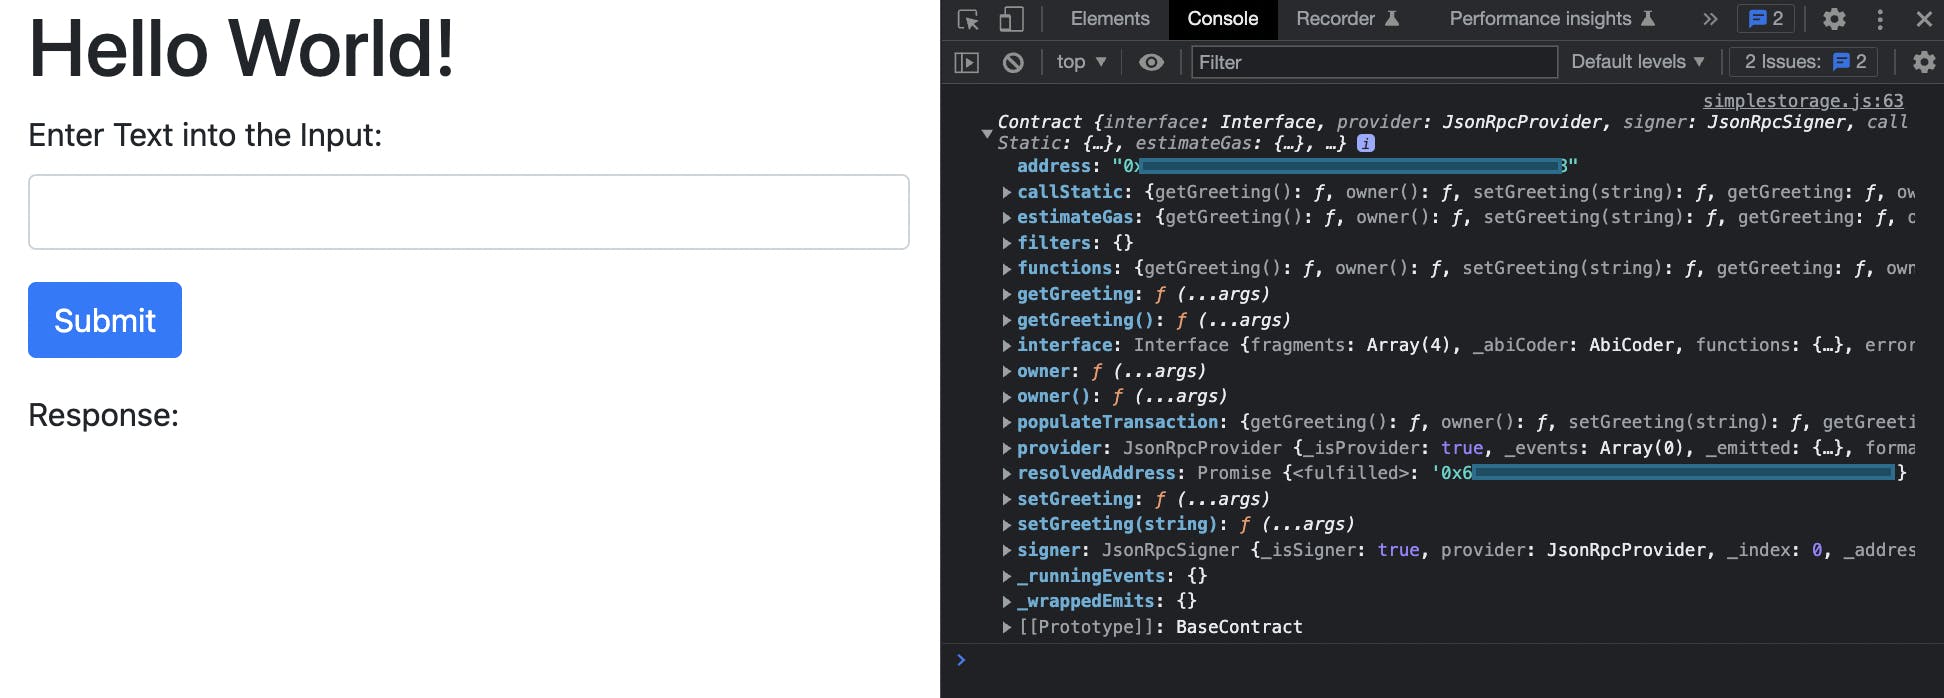
Open the developer console in the browser where the index.html file is running, and you will see the Hello World contract logged in the console. Click the drop-down arrow, and you will see all the functions deployed in the contract available as JavaScript method calls.
- Implement functions to Write and Read the Smart Contract. There are three functions in the Smart Contract:
getGreeting,ownerandsetGreeting. We will create a function calleddoGreetingand inside it, we will write instructions forsetGreetingand return the response in the console, then, we will write functions to set theownerand another to returngetGreeting.
function doGreeting() {
const setGreeting = document.getElementById(“setGreeting”)
const greeting = document.getElementById(“greeting”)

setGreeting.addEventListener(“submit”, e => {
    e.preventDefault;

    const greeting = e.target.element[0].value
    Contract.setGreeting(greeting); //This will write the argument to the contract.
    console.log(greeting);
})

}
The next step is to write the function to getGreeting and set it in the <span>...</span>. Continue inside the doGreeting block:
const $getGreeting = async () => { Contract.getGreeting().then(result => { $data.innerHTML = result; }) }
To return the greeting as it is set via the $setData method, call the $getGreeting function in $setGreeting, after the console.log statement add:
$getGreeting();
The last step step in the section is to trigger a DOM event to render the javascript. At the end of the file and outside the doSomething function, add add event listener:
addEventListener(“DOMContentLoaded”, doSomething());
This means that when the DOM is completely loaded, carry out the JavaScript actions. The entire idex.js file now looks like this:
const HelloWorldAddress = `0x…..`;
    const ABI = [
 {
      "inputs": [],
      "stateMutability": "nonpayable",
      "type": "constructor"
    },
    {
      "inputs": [],
      "name": "getGreeting",
      "outputs": [
        {
          "internalType": "string",
          "name": "",
          "type": "string"
        }
      ],
      "stateMutability": "view",
      "type": "function"
    },
    {
      "inputs": [],
      "name": "owner",
      "outputs": [
        {
          "internalType": "address",
          "name": "",
          "type": "address"
        }
      ],
      "stateMutability": "view",
      "type": "function"
    },
    {
      "inputs": [
        {
          "internalType": "string",
          "name": "_greeting",
          "type": "string"
        }
      ],
      "name": "setGreeting",
      "outputs": [],
      "stateMutability": "nonpayable",
      "type": "function"
    }

];

const signer = getSigner();
const Contract = new ethers.getContractFactory(HelloWorldAddress, ABI, signer);
console.log(Contract);


function doGreeting() {
const setGreeting = document.getElementById(“setGreeting”)
const greeting = document.getElementById(“greeting”)

setGreeting.addEventListener(“submit”, e => {
    e.preventDefault;
      const greeting = e.target.element[0].value
      Contract.setGreeting(greeting); //This will write the argument to the contract.
      console.log(greeting);
  $getGreeting();
  })
}

const $getGreeting = async () => {
   Contract.getGreeting().then(result => {
      $data.innerHTML = result;
  })
}
Interact with the UI
You have completed a full Dapp. Written the Smart Contract and deployed it to the local Hardhat environment. Built a UI using HTML and JavaScript. You start sending content to the Contract and have it returned. As a challenge, write the function to return the owner address to the UI.
Conclusion
This guide is a learning curve to help you understand the basics of interacting with functions in solidity from any UI, by using the Ethers JS library to abstract the JSON-RPC calls. It serves as a background to understanding how you can build a UI for any contract deployed to any EVM-compatible chain.