Build and Deploy a Smart Contract on NEAR Blockchain

I am a Solidity Engineer. I publish technical articles on Solidity and the EVM.
In this article, we will build a decentralized donor app where anyone in any part of the world can send near tokens to victims of violence. The article is broken into the following sections:
Brief Overview of NEAR
Installing dependencies
Smart Contract
Frontend
Conclusion
Brief Overview of NEAR
There are many blockchain networks which exist. This is great as it fully underscores the primary idea behind decentralization. One such Blockchain network is the NEAR Blockchain. NEAR is described as a Layer 1 (L1), sharded, proof-of-stake Blockchain. Let’s define the words used to describe NEAR in the context of use in this article.
L1
Layer 1 also commonly referred to as L1 is simply the base (primary) blockchain network for a particular protocol. It is easier to grasp the concept when it is compared side by side with Layer 2 (L2) blockchains which are protocols built on top of the L1 chains and sometimes also include sidechains and other offerings depending on the network. All transactions that take place on an L1 chain are finalized on the network according to the rules embedded in the network protocol. An example is a finality for transactions which on NEAR is 2 seconds. An L2 may be built to improve on this. The NEAR blockchain is still, at this time, an L1 solution.
Sharding
Blockchain sharding refers to a blockchain network separated/broken into smaller components called shards. Transactions are then carried out on the shards. Sharding is done to help increase the number of transactions that can be carried on a blockchain and thus leading to an increase in its throughput and possibly, latency. Harmony is an example of a blockchain that relies on sharding to increase its overall performance. As a result, each shard of Harmony is treated as its own network, holding transaction state in its block changes. Each Harmony shard has its own network id. NEAR is a sharded blockchain, unlike Harmony, NEAR shards through individual networks, do not have their own network ids. This sharding implementation of NEAR is called the Simple Nightshade.
Proof Of Stake
Blockchains as open ledgers require participants to validate all transactions which will lead to state changes. That means that all participants must reach a consensus on the data in every block. There are 2 methods for reaching consensus: Proof of Work (PoW) and Proof of State (PoS). Proof of Work consensus relies on the calculation of a mathematical algorithm using computers to validate blockchain data. This uses a lot of computing power. On the other hand, Proof of State relies on validators who have staked a bond in the blockchain network to act as data verifiers. This does not require much computation and as a result, it places a low demand on hardware. NEAR blockchain is often referred to as being carbon neutral because it uses the Proof of Stake consensus approach.
Now that we have established a definition for the NEAR blockchain, we are going to be building a DApp and deploying it on the Blockchain. Just a quick reference guide, I’ll briefly explain why sharding as technology is important to a developer’s decision in deciding on a Blockchain to build on.
Ethereum blockchain can carry out less than 20 Transactions per second. This means that the transaction finality on Ethereum is about 1.2 minutes. This is a low throughput that is associated with other challenges such as an increase in fees for validating transactions and latency. Ethereum is also an L1 solution. The NEAR blockchain was premised on solving the low throughput and latency problems for Ethereum. From the onset, the developer of the NEAR chain decided to rely on sharding to ensure that NEAR would be able to do a minimum of 2500-3000 Transactions per second, with a finality of 1.2 seconds. This is a whole lot faster than Ethereum L1. This should be given thought to developers who wish to build on an L1.
In this article, we will build a NEAR Dapp for making donations to a charity for victims of violence. The donations will include notes from the donors.
We can build Blockchains on NEAR using Rust programming language or Assembly script. We are going to be using Rust.
Installing Dependencies
First, if you have yet to, you need to install RUST on your local machine. You can follow the guide here: https://www.rust-lang.org/tools/install
Also, install the near-cli via the terminal
$ npm install -g near-cli
Please note that this article is not a guide on Rust programming language. The motif of this article is to demonstrate to you how easy it is to write Smart Contract code in Rust and deploy it on the NEAR Blockchain. NEAR has its library for spinning up projects similar to the Create React App. It is called the Create NEAR App. It is bundled with a React frontend library that has a lot of existing features for quickly building apps. We will use the Create NEAR App to demonstrate how to build the project.
Smart Contract Code
To begin writing the Smart Contract, run the command:
$ npx-create-near-app near-donor-dapp
It will prompt you to add the assembly script wasm file, respond yes.

When the dependencies have finished installing, cd into the project directory:
$ cd near-donor-dapp
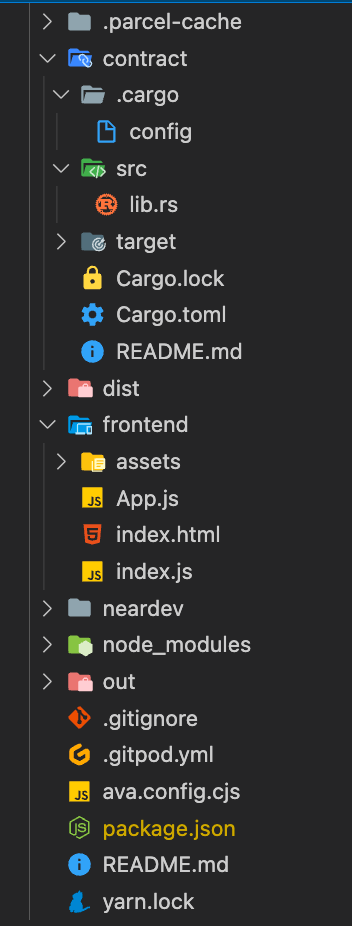
If you are used to building projects using ReactJS, you will observe a similarity in the project directory. Open the project in an IDE like VSCode, the dir structure looks like this:
To have the Dapp running locally, run
$ yarn build

$ yarn run dev
Go to localhost:1234 to see the app running:
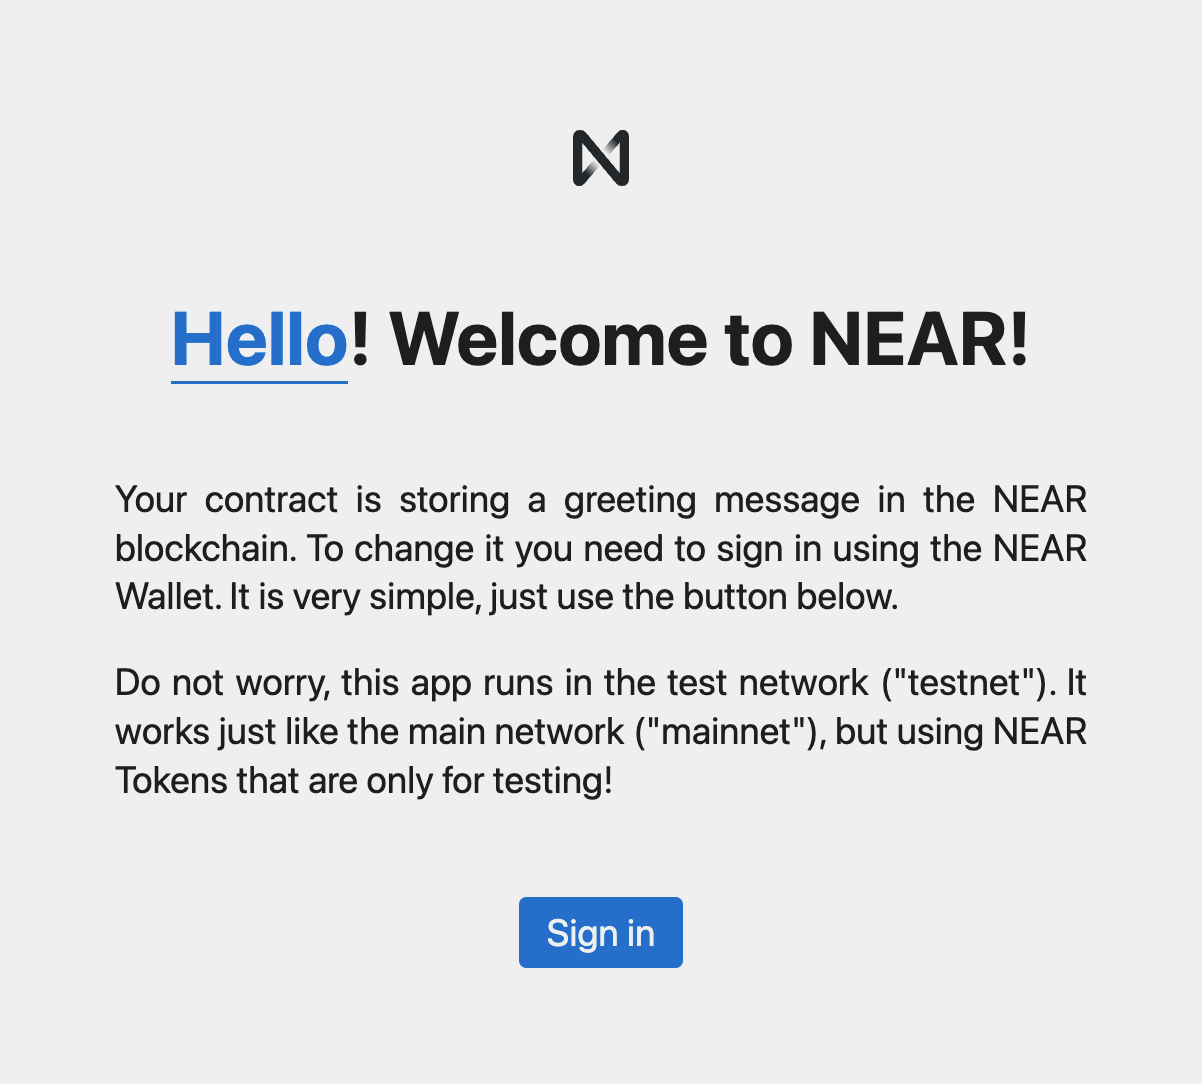
You can try interacting with the Dapp by clicking the “Sign in” button. The Dapp is running on the NEAR testnet and it is safe. When you click the button, you will be prompted to give the Dapp access to your NEAR account:
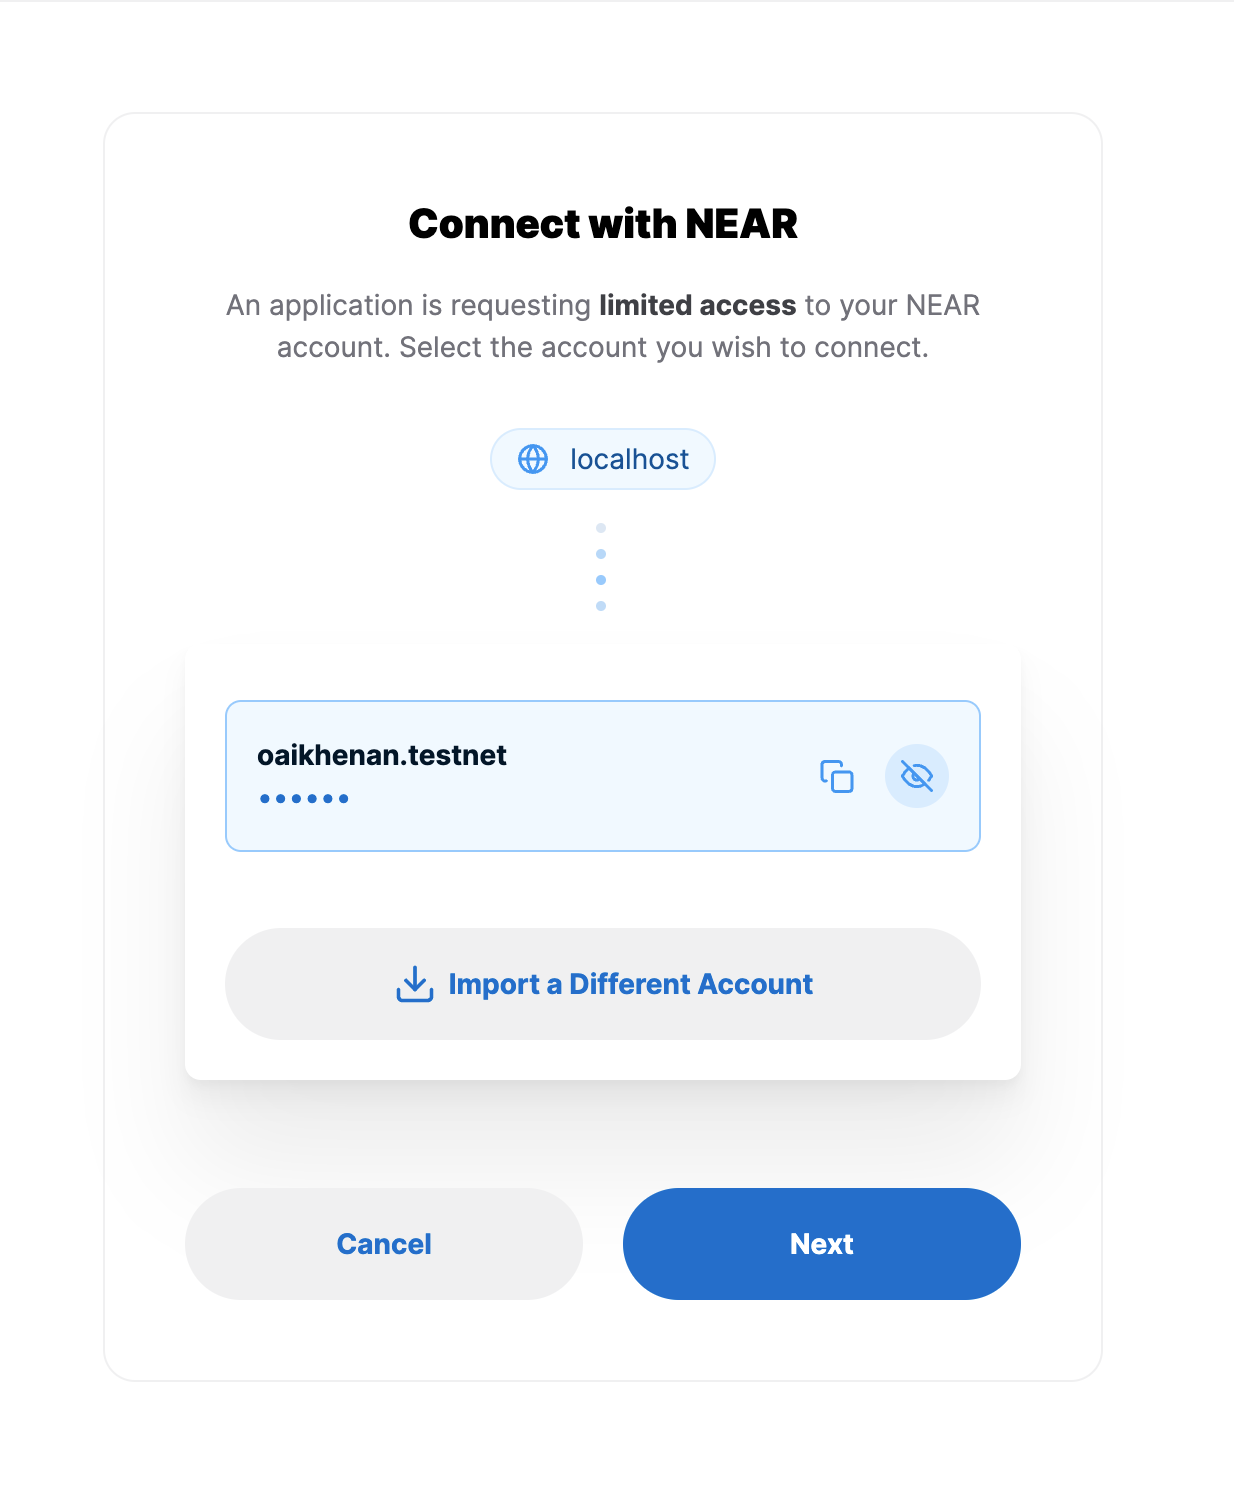
That is a default greeting DApp, you can go ahead, and interact with it!
We have successfully used the create NEAR App. Next will be to write the Smart Contract code for the implementation of the donor Dapp and deploy it to a NEAR address of our choosing.
As a guide, let’s design the Smart Contract logic using an illustration.

It is a simple DApp.
Smart Contract
The Smart Contract code will be written in Rust. Open the src folder and you will find the lib.rs file. Open the lib.rs file, you will find the example greeting contract. For our donor app, we are not going to write any tests, so you can go ahead and delete the lines of code from line 45 to the end, the tests module.
Before we delete the example greeting contract, study the comments for the implementation and the functions in the contract. There is a set_greeting method and a get_greeting method. The set_greeting method changes the state of the blockchain as it is used for sending data. The get_greeting method is a view function that does not impact the state of the blockchain.
The Near Donor app will have 3 functions:
A function for sending tokens to a selected address. This function will take 3 arguments:
amount,receiver_addressandnote.A function for getting the transactions sent to the contract.
A view function for returning the transaction information sent on-chain.
In the lib.rs file, delete the default message line, delete the message of String data type in the Contract struct, and delete the functions inside the Default and Contract implementation you, will be left with barebones code like this:
use near_sdk::borsh::{self, BorshDeserialize, BorshSerialize};
use near_sdk::{log, near_bindgen};

// Define the contract structure
#[near_bindgen]
#[derive(BorshDeserialize, BorshSerialize)]

pub struct Contract {

}

// Define the default, which automatically initializes the contract
impl Default for Contract{

}

// Implement the contract structure
#[near_bindgen]
impl Contract {

}
I’ll go over each line of code and explain what they are meant for:
use near_sdk::borsh::{self, BorshDeserialize, BorshSerialize};
We are using the near_sdk for writing the contracts, Borsh is “a non self-describing binary serialization format. It is designed to serialize any objects to a canonical and deterministic set of bytes”. It is designed for storing contract state efficiently on the NEAR chain to save storage and gas costs.
use near_sdk::{log, near_bindgen};
These are macros in the NEAR sdk that we will be calling in our project
#[near_bindgen]
#[derive(BorshDeserialize, BorshSerialize)]
The macro near_bindgen is wrapped around the struct to generate the smart contract. Every Rust contract is preceded with this macro as it allows it to make calls that change the contract state and receive calls.
pub struct Contract {...}
The public method implementation of an impl method will be defined in this struct
impl Default for Contract{ … }
Defines the default method call, which automatically initializes the contract
#[near_bindgen]
impl Contract { … }
The contract implementation will live here. The method calls for setting the state and viewing the state will be defined here.
We will add some macros to the near_sdk that we will need in the course of writing the Contract. They are: AccountId and Promise.
use near_sdk::{log, near_bindgen, AccountId, Promise, env};
AccountId is a near_sdk type definition for a user who is transferring tokens. The concept of a Promise here is similar to its use in JavaScript. env contains the information on the user who will interact with the methods in the contract. It provides an easy way to call the user address.
The contract is going to store data on-chain and that will cost gas to store. To optimize the cost of storage, we will use a LookupMap to store the data. A LookupMap stores key and value once. requires only one storage read to get the stored value.
The LookupMap is a method of the std_collection library. We will import it into the project via the near_sdk
use near_sdk::collections::LookupMap;
Now that we have added the LookupMap, we can store the key: value pair of the data type that we wish to return using the LookupMap. We will implement this in the struct for the Contract:
pub struct Contract {
  note: LookupMap<String, Vec<String>>
}
This is simply holding the note in a LookupMap. LookupMaps are non-iterable.
Define the Default impl:
impl Default for Contract{
   fn default() -> Self {
       Self {
            note:LookupMap::new::(b"note".to_vec())
        }
   }
}
The Default stores the data parsed via the LookupMap on the chain in an ordered index of array items, identified by numbers which can easily be looked up and returned and also easily save the data as stated above.
Next, we will implement the state methods and view method for the contract! These methods will be in the impl Contract.
The easy state change method, to begin with, is the donate function:
pub fn donate(&mut self, account_id:AccountId, amount:f64) {
Promise::new(account_id).transfer(amount as u128);
}
It is a publicly called function hence, the pub definition. The function is called: donate, and it takes 2 args. The &mut self is Rust's way to confirm that it is a mutable function call. The AccountId from the near_sdk collection is parsed to account_id, this will be the wallet id of the user making a donation, the amount is of primitive data type f64.
It is a Promise call, where the transfer method is called on the account_id to transfer the specified sum which is on int type 128.
Now we can call the donate function and transfer tokens. Let’s add a heartfelt note to the donations:
pub fn note(&mut self, note_text: String, amount: String) {
let account_id = env::signer_account_id();
let user = self.note.get(account_id);
}
This is the note function, it is mutable hence the &mut self arg. It takes two argos, note_text and amount which it stores on chain. The args are of type String.
Here we see the use of the near_sdk env, it helps retrieve the details of the user who is signing the contract interaction. We declared a variable account_id to hold the amount information. The second variable user assigns the account information by calling the get() method to associate the account_id to the user in the LookupMap.
We are not done with this function as we still have to push the arg passed to the function on-chain when the function is called. There is a condition to check for when we implement this: Do we already have available information on the user calling the method?
We will use an if else statement to check for when we have the associated user information. When we do, we will push the data to a vector of arrays.
if user {
let mut list = match self.note.get(&account_id) {
Some(var) => var;
None => vec![];
};
list.push(note_text + “||” +&amount + “ NEAR.”);
self.note.insert(&account_id, &list);
} else {
let list = vec![note_text + “||” +&amount + “ NEAR.”];
self.note.insert(&account_id, &list);
}
This is an if else statement. The critical information to highlight here is the
Some(var) => var;
None => vec![]
This is the rust array macro argument which checks if a user information exists in the list variable and creates an array if it does not.
The push method sends the information on chain.
We are done with the functions that change the state of the contract and will now write our last function to view/return the data on chain. The view functions do not incur gas costs.
pub fn view_donations(self, user:String) -> Vec<String> {
match self.note.get(&user) {
Some(var) => var;
None => vec![]
}
}
This is not a mutable function as view functions are not mutable. You do have to indicate the self keyword. It takes in the user info and returns a Vec of String. This is the format in which the info was saved on-chain.
Using the match keyword, we can check through the array vectors if a user exists or not.
We are done with the functions needed for the Smart Contract. We can compile the contract and deploy it to the NEAR Testnet to interact with it. To compile the Smart Contract, run
$ yarn build
The Smart Contract will compile without errors. Every time you make a change to the Smart Contract code, you will have to compile it. When the compilation is complete, the next step will be to deploy the Smart Contract. The deployment will be done in your terminal using the near-cli.
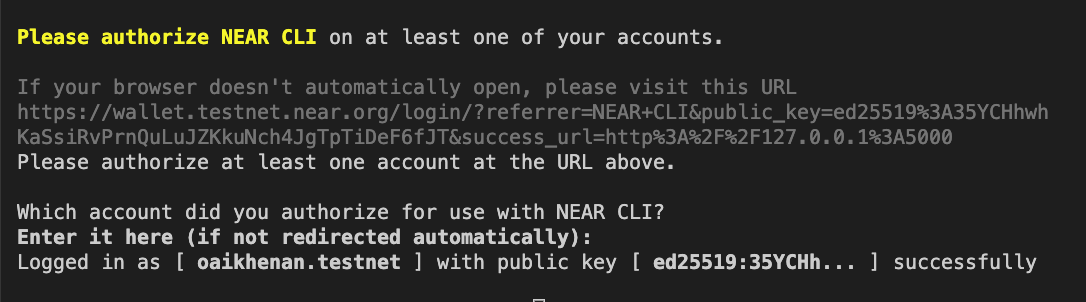
Open a terminal and ensure you are in your project directory, First we have to login to NEAR. This is to create a connection the testnet account where we will deploy the Smart Contract. Run th e command:
$ near login
This will open a window in your browser where you will be prompted to login to your Testnet wallet. The near login command connects to the NEAR testnet by default. This is to ensure a layer of security so you do not spend actual tokens in error. To connect to the Mainnet account, you can see the instructions in the NEAR docs.
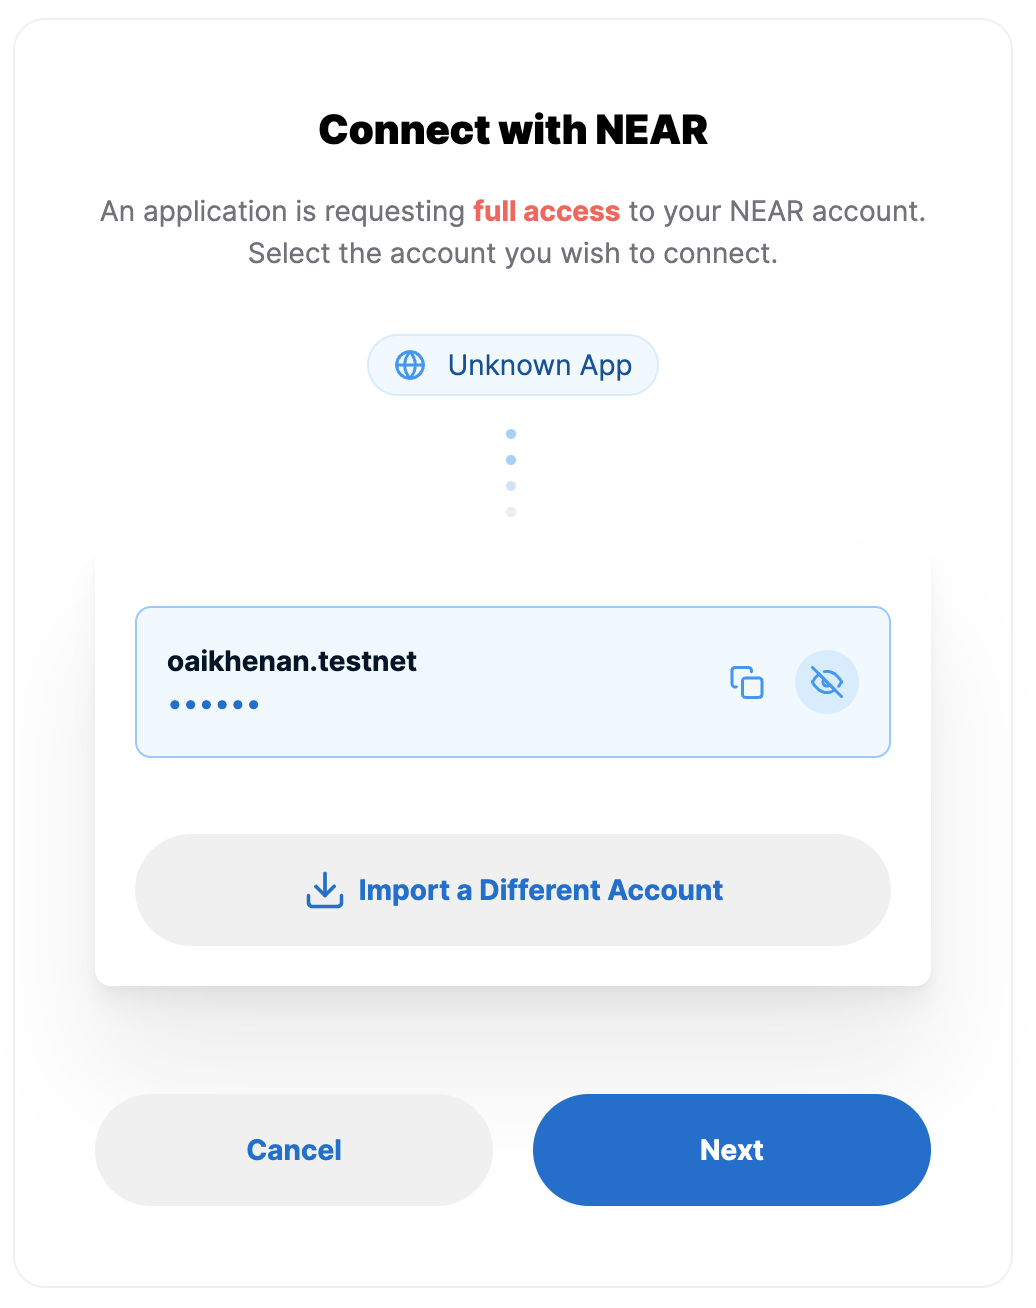
If you look closely, you will notice a difference here from where we connected to the dapp we initialized at the beginning. This is a connection to the NEAR blockchain from our computer and we are requesting full access to all the account privileges associated with our NEAR account.
To deploy the contract on-chain, run the command:
$ near deploy --wasmFile target/wasm32-unknown-unknown/release/rust_counter_tutorial.wasm --accountId YOUR_ACCOUNT_HERE
Where YOUR_ACCOUNT_HERE is the account where you deployed the code, e.g: oaikhenan.testnet
Once the contract has successfully deployed, we can begin interacting with it by calling the function via our cli using near-cli commands.


