How to Create Upgradeable Solidity Smart Contracts

I am a Solidity Engineer. I publish technical articles on Solidity and the EVM.
Why Upgrade Smart Contracts?
Smart Contracts are meant to be immutable! After all, that is a principal pillar on which decentralization rests. Why then do we have to need to create new versions of Smart Contracts (read upgrade)? Well, same reason why the V2 of software is better than V1. Duh! That was obvious, no?
OK! Granted. Why then do you not write another Smart Contract code and then redirect the users to a new version via the DApps frontend? Hmmm, fair point, until you have to take into account such things as:
Tracking state changes.
Developers interacting with the Smart Contract code.
Maintenance…
Just to mention a few reasons why upgrading Smart Contracts is necessary.
Now that the reason has been established, how then can a developer upgrade their Smart Contracts, knowing fully well that a Smart Contract once deployed to a Contract address cannot be deleted?
This is where we get into the Technical deets of upgrading Smart Contracts. We will rely on the Open Zeppelin Proxy patterns to understand the concept. It is important to note that upgrading Smart Contracts does not just mean adding code to an already existing Contract. In the example we are going to use for demonstration, we will write a Proxy Smart Contract that will point to the V2 of the contract V1. Where V2 is an updated version of V2 with all the functions still in use and more added, or some functions removed or an algorithm rewrite. The Proxy ensures that the same address is what points to V1, V2,... Vn of the said Smart Contract. This way, the user sends a txn to the Proxy Contract, which then interacts with whatever version it is pointed to. Yes, each version and the proxy are immutable!

Open Zeppelin has a great resource on explaining Proxy Contracts: https://docs.openzeppelin.com/upgrades-plugins/1.x/proxies You can learn about the various methods for upgrading Smart Contracts by reading the article.
Introduction
In this article, I’m going to demonstrate to you the Transparent Proxy pattern. To do this, we will build a simple Contract that we will likely upgrade to new versions in the future. The Contract sets the price for a train ticket. Given that there are no rising Economic costs, the tickets cost the same wherever the destination, so there is room for increasing the Ticket Price if ever there is a need. To do this, we will follow the steps:
Write the code for v1 of the Train Ticket Smart Contract using Hardhat and deploy it to the Goerli Testnet.
We will use an Open Zeppelin library called the hardhat upgrades in the deployment scripts. The Hardhat upgrades contain a method called
deployProxy. This method ensures that when the contract is deployed, it creates a Proxy Contract as well.We will then write V2 of the Contract and then using hardhat upgrades, we will call the method
upgradeProxyand point the deployed Contract to the proxy contract!
The upgradeProxy method takes 2 args and any other args passed to the Contract call:
upgradeProxy(PROXY, Contract, [any args passed to the Contract])
Smart Contract v1
I have a standard practice of writing Smart Contracts in Remix and then initializing a Hardhat Project on my machine. Thus, we will write the TrainTicketV1 using Remix.
Here is TrainTicketV1.sol
// SPDX-License-Identifier: MIT
pragma solidity ^0.8.14;

contract TrainTicketV1 {
    uint amount;
    address public owner;

    function setOwner() public {
        owner = msg.sender;
    }

    function setTicketPrice() public {
        require(owner == msg.sender, "Only the owner can set price");
        amount = 10000000000;
    }

    function getTicketPrice() view public returns (uint){
        return amount;
    }

}
Please note that this is for illustration purposes only and should not be deployed to production, especially given the reason that you do not want to give anyone the power to set the contract address and change ticket prices!
OK! I have confirmed that the Smart Contract code works and now we are going to set up a Hardhat Project and deploy the code to the Goerli Testnet using Hardhat deploy script and Open Zeppelin Hardhat deploy.
This article assumes that you understand how to set up a Hardhat project, if you do not, kindly follow the Hardhat guides for creating a new hardhat project: https://hardhat.org/tutorial/creating-a-new-hardhat-project.html
If you used the guide above, then, Hardhat generated a Greeter.sol file in the Contracts dir. Delete the content and replace it with the TrainTicketV1 code above. If you are familiar with writing Solidity, you could be surprised that the contract is not initiated with a Constructor argument. This was a gotcha moment for me too as I got to learn that Smart Contracts that are designed to be upgraded via the Transparent Proxy pattern are not initiated with a Constructor!
We are going to deploy the Contracts to the Goerli Testnet. You can use any EOA via Metamask or Ganache UI. What you will need are the Private Keys and some ETH from the Goerli Faucet here: https://goerlifaucet.com/ N.B: You will need to have an Alchemy account to receive tokens from this faucet. This is fine anyway, as we will rely on Alchemy as a provider to deploy the Smart Contracts to Goerli.
Wallet Private Key (from Metamask preferably) ready, check…
Received Tokens from the Faucet, check…
Sign in to Alchemy, create a Project and get the API KEY for the Project.
Deploy Smart Contract v1
This is where we get to the section where we will use the Open Zeppelin library to deploy our Smart Contract.
We will add this dependency to the package.json file: https://www.npmjs.com/package/@openzeppelin/hardhat-upgrades
According to the documentation: “You can use this plugin in a Hardhat script to deploy an upgradeable instance of one of your contracts via the deployProxy function.” This is just as I had explained earlier!
Seeing as we are installing dependencies, kindly throw in installing the dotenv library. Shsss… It is for secrets!
After the installation has been completed (which I’m certain you know how to do, or if you have forgotten, it is
npm install --save-dev @openzeppelin/hardhat-upgrades dotenv
Now we are ready to write a script to deploy our Smart Contract to the Goerli Testnet.
- Alchemy API… Check!
To deploy to an actual network using Hardhat, we have to add a Network configuration to the hardhat.config.js file.
Deleted the tasks block of code, delete the hardhat-waffle dependency that came default with the file, add the required dependencies and update the module.exports config:
require("@nomiclabs/hardhat-ethers");
require("@openzeppelin/hardhat-upgrades");
require('dotenv').config();

const ALCHEMY_API_KEY = process.env.ALCHEMY_API_KEY;
const EOA_PRIVATE_KEY = process.env.EOA_PRIVATE_KEY;

module.exports = {
  solidity: "0.8.14",
  networks: {
    goerli: {
      url: https://eth-goerli.alchemyapi.io/v2/${ALCHEMY_API_KEY},
      accounts: [`${EOA_PRIVATE_KEY}`]
    }
  }
};
We will need the Alchemy API Keys and EOA Private Key hidden somewhere! As I mentioned earlier, it is a secret we will keep in a .env file! Remember to add the .env file to your .gitignore if you are planning to push your code using a version management tool to any cloud service.
The Alchemy API KEY and the EOA Private Key are rendered to the hardhat config file using dotenv. Dotenv uses process.env to read files from the .env file.
It is in the hardhat configuration that we also require the Hardhat upgrades and the hardhat ethers. Both are required for when we have to deploy the Smart Contract.
Now, we have the hardhat configuration ready, let’s compile the Contract to generate the artifacts and the cache dir.
$ npx hardhat compile
When the contract is successfully compiled, a success message is returned to the terminal:
Compiled 1 Solidity file successfully
Next is our deploy script! Just so you recall, we are deploying the TrainTicketV1.sol Smart Contract which as already been compiled. Open the scripts folder and delete the sample scripts file created by Hardhat. Create a new file, you can name it deploy_v1.js, add the following code:
const { ethers, upgrades } = require("hardhat");

async function main() {
  const Contract = await ethers.getContractFactory("TrainTicketV1");
  console.log("Deploying Train Tikcet v1...");

  const contract = await upgrades.deployProxy(Contract)
  await contract.deployed();
  console.log("Contract deployed to:", contract.address);
}

main()
  .then(() => process.exit(0))
  .catch((error) => {
    console.error(error);
    process.exit(1);
  });
Let’s breakdown what happened here line by line:
const { ethers, upgrades } = require("hardhat");
ethers is available to us as a class function on which we call the getContractFactory method. upgrades is available via the hardhat library and we call the deployProxy method on it. As has been explained earlier, deployProxy is the magic function.
await contract.deployed() is to ensure we can read the deployed contract methods if we had a frontend for instance.
To deploy the Contract to the Goerli Testnet and experience the beauty of upgrading a contract using TransferProxy, run the following command:
npx hardhat run scripts/deploy_v1.js --network goerli
It will return the console.log message prompts we added to the deploy_v1.js file
Deploying Train Ticket v1...;
When successful
Contract deployed to:", <contract.address>
Open the Goerli Testnet Explorer: https://goerli.etherscan.io
Do not go to the Contract Address immediately, first, look up the EOA that you used in deploying the Smart Contract and view the Txns that took place! Wait for it… You will find 3 txns and not 1! Haha! Fascinating!

Rank from top to bottom:
This is the
TransparentUpgradeableProxy, this holds the Contract address where all new versions of Train Ticket will be interacted with.This is the ProxyAdmin where all Transactions between upgrades and
TransparentUpgradeableProxywill be routed.This is the actual version 1 of the Train Ticket Contract!
To interact with the Contracts via Etherscan, we will
Verify and Publish the Smart Contract Code
Verify the
TransparentUpgradeableProxyand set it as a Proxy (i.e The Contract that will be interacted with.)
Via Etherscan, follow the steps to verify and publish the TrainTicketV1 contract. Once verification is done, go to the Proxy Contract (i.e TransparentUpgradeableProxy), open the Contract Tab and click on the dropdown button: ‘more options’
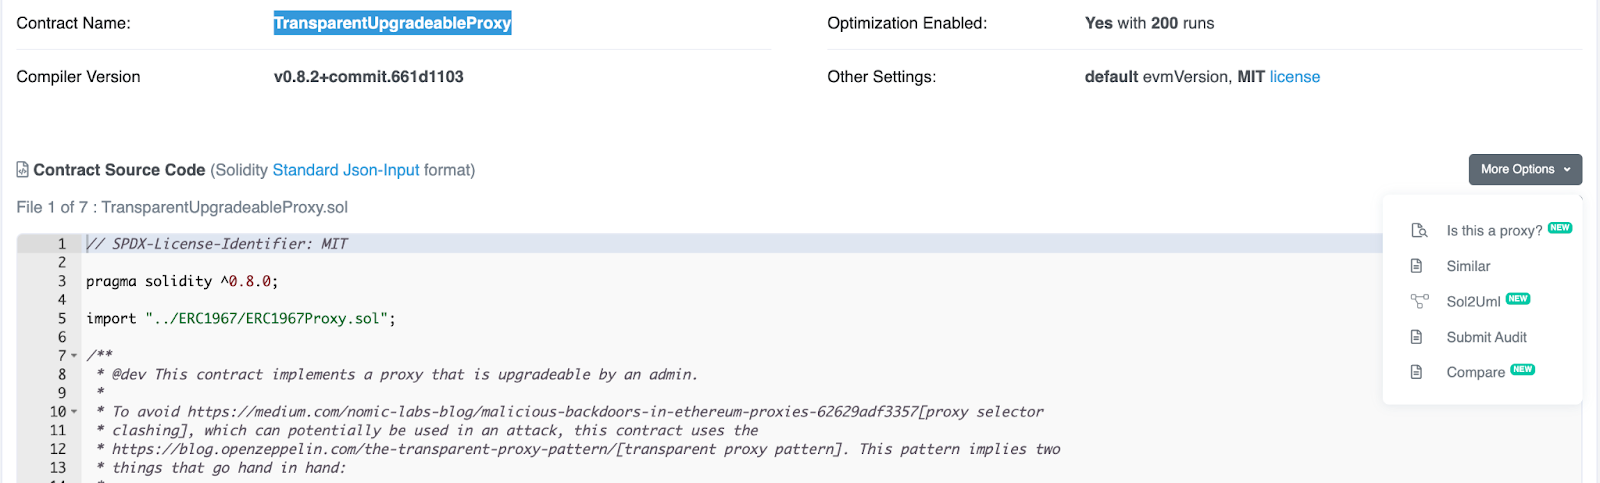
Click on: ’Is this a Proxy?’
On the next screen, click on: ‘Verify’
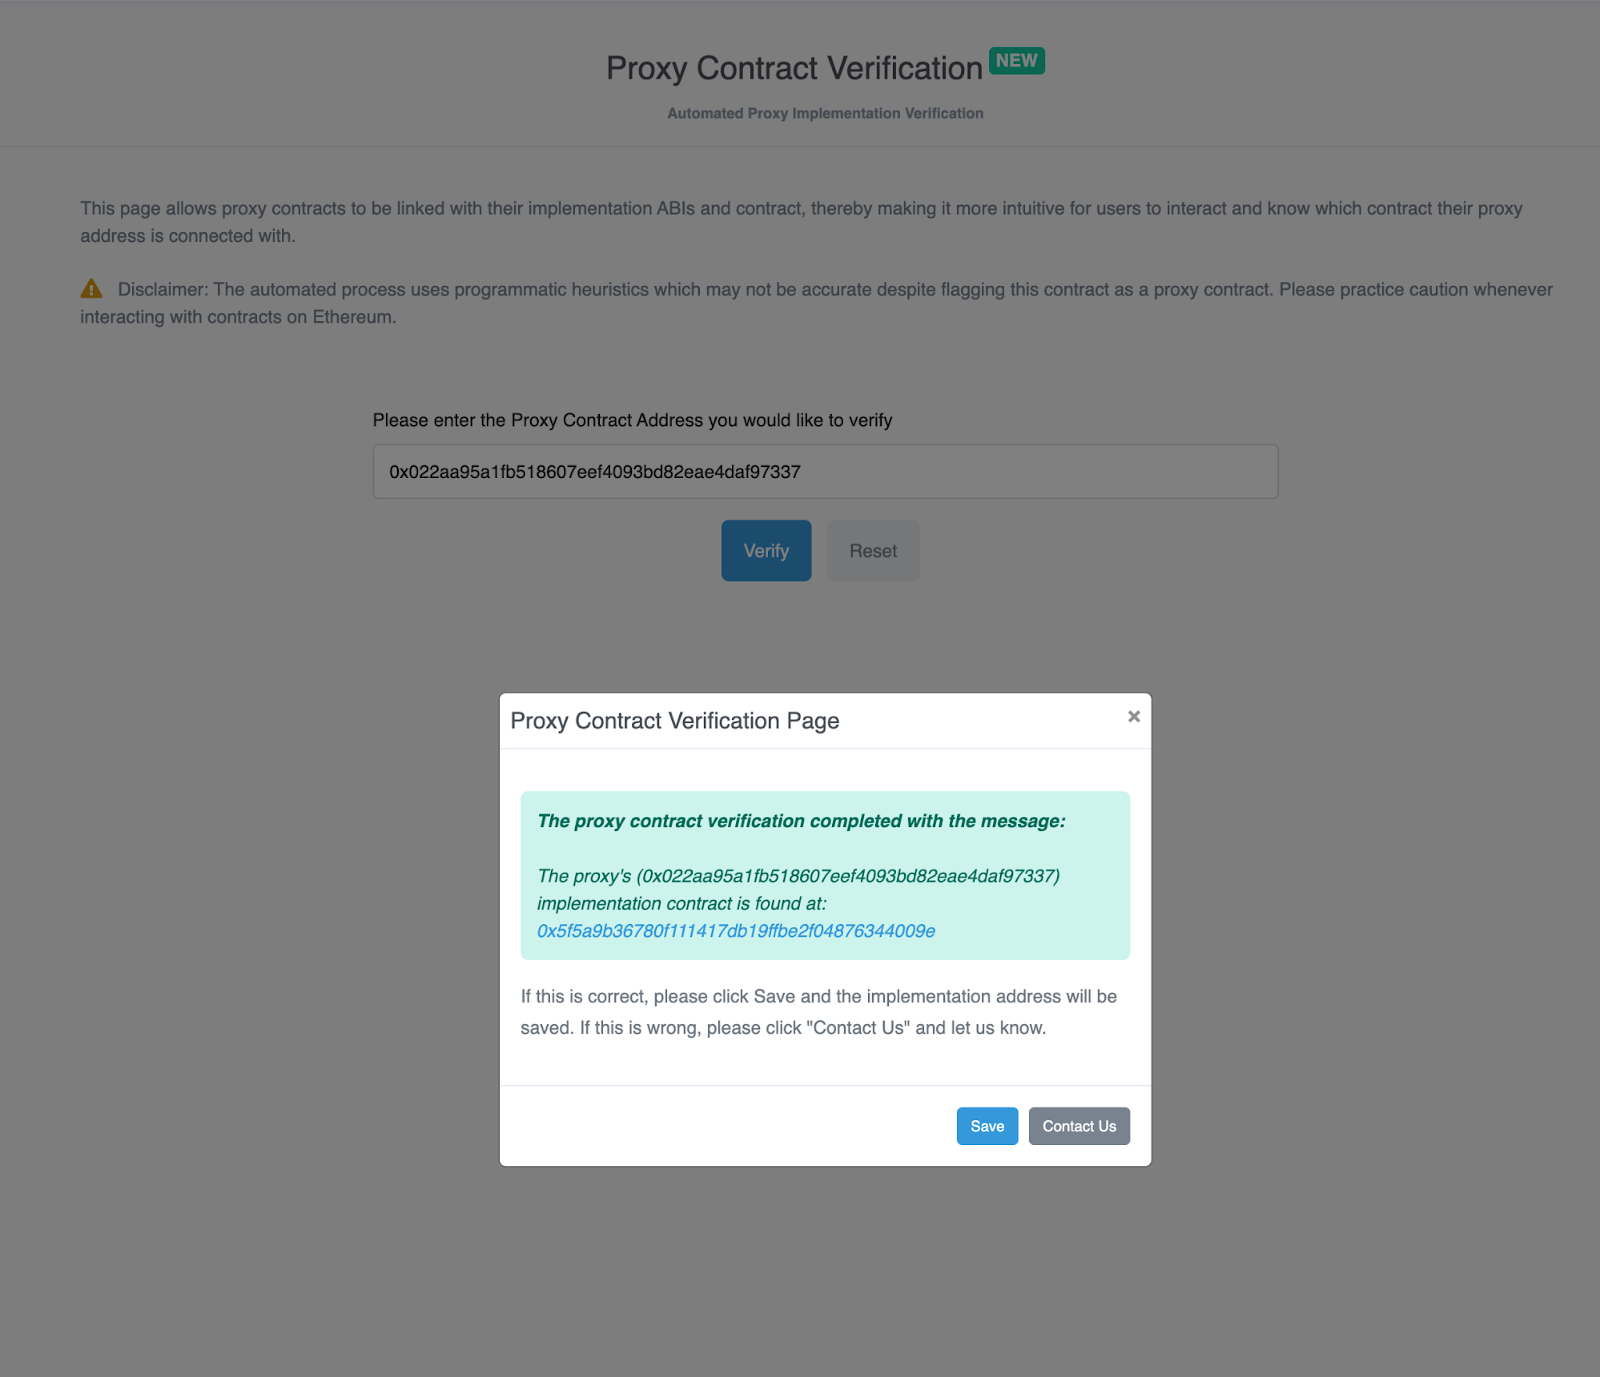
Click: ‘Save’
The Contract is now verified 🎉 and you have the ‘Read As Proxy’ and ‘Write as Proxy’ buttons!

Go test it! Here is my implementation: https://goerli.etherscan.io/address/0x5f5a9b36780f111417db19ffbe2f04876344009e#code
Smart Contract v2
This is version 1 of the TrainTicket Smart Contract successfully deployed! We will deploy version 2 next. To do that, we need to
Write
TrainTicketV2.solCompile the Contract.
Write
deploy_v2.jsscript.Deploy the Contract as a Proxy!
Just like eating sweet cake!
First, TrainTicketV2.sol
// SPDX-License-Identifier: GPL-3
pragma solidity ^0.8.14;

contract TrainTicketV1 {
    uint amount;
    address public owner;

    function setOwner() public {
        owner = msg.sender;
    }

    function setTicketPrice() public {
        require(owner == msg.sender, "Only the owner can set price");
        amount = 10000000000;
    }

    function getTicketPrice() view public returns (uint){
        return amount;
    }
}
If you look closely, the only difference here is the new price set for purchasing Train Tickets! Inflation? I hope not!
Compile the Contract. It should compile successfully.
Deploy v2
Next, the deploy script! Here is where it all gets interesting, watch closely. This time, name the file deploy_v2.js.
const { ethers, upgrades } = require("hardhat");

const PROXY_CONTRACT = "0x022aA95A1fB518607eEF4093Bd82eAe4dAF97337";

async function main() {
  const Contract = await ethers.getContractFactory("TrainTicketV2");
  console.log("Deploying Train Ticket v2...");

  await upgrades.upgradeProxy(PROXY_CONTRACT, Contract)
  console.log("Contract Upgraded");
}

main()
  .then(() => process.exit(0))
  .catch((error) => {
    console.error(error);
    process.exit(1);
  });
I explained the method call getContractFactory on class ethers. What is different here is this:
We set the
PROXY_CONTRACTaddress so that the new version of the Train Ticket contract can point to it.The above is achieved when we call
upgradeProxymethod onupgradesclass.
Deploy the new version!
npx hardhat run scripts/deploy_v2.js --network goerli
Once, you have successfully deployed as confirmed from the messages logged to the console, go take a look at the new transactions on the address, this time you will find 2.

Rank from top to bottom:
This is the NEW ProxyAdmin where all Transactions between upgrades and
TransparentUpgradeableProxywill be routed.This is the actual version 2 of the Train Ticket Contract!
If you already realized that the TransparentUpgradeableProxy from the first deployment is where you contract is pointed to, then you are a-mazing!
All, you have to do now is:
Verify and Publish the TrainTicketV2 contract
Set as Proxy using the same steps as above!
Once that is complete, users will be interacting with V2 of your Smart Contract! You can upgrade as much as you want up to Vn…
That my dear reader is how to upgrade a Smart Contract!
Here is my V2 implementation: https://goerli.etherscan.io/address/0x53bbdb042997ddbf2be8116e6c6d3c9205026ab7#code
Here is my Proxy Contract Implementation: https://goerli.etherscan.io/address/0x022aa95a1fb518607eef4093bd82eae4daf97337
Thank you for reading this far! If you found the content useful, please kindly share it with your network.
Source Code
You can find the complete source code here: https://github.com/emmaodia/tutorials-code/tree/main/train-ticket


